Custom Divi Blurbs – Part 3
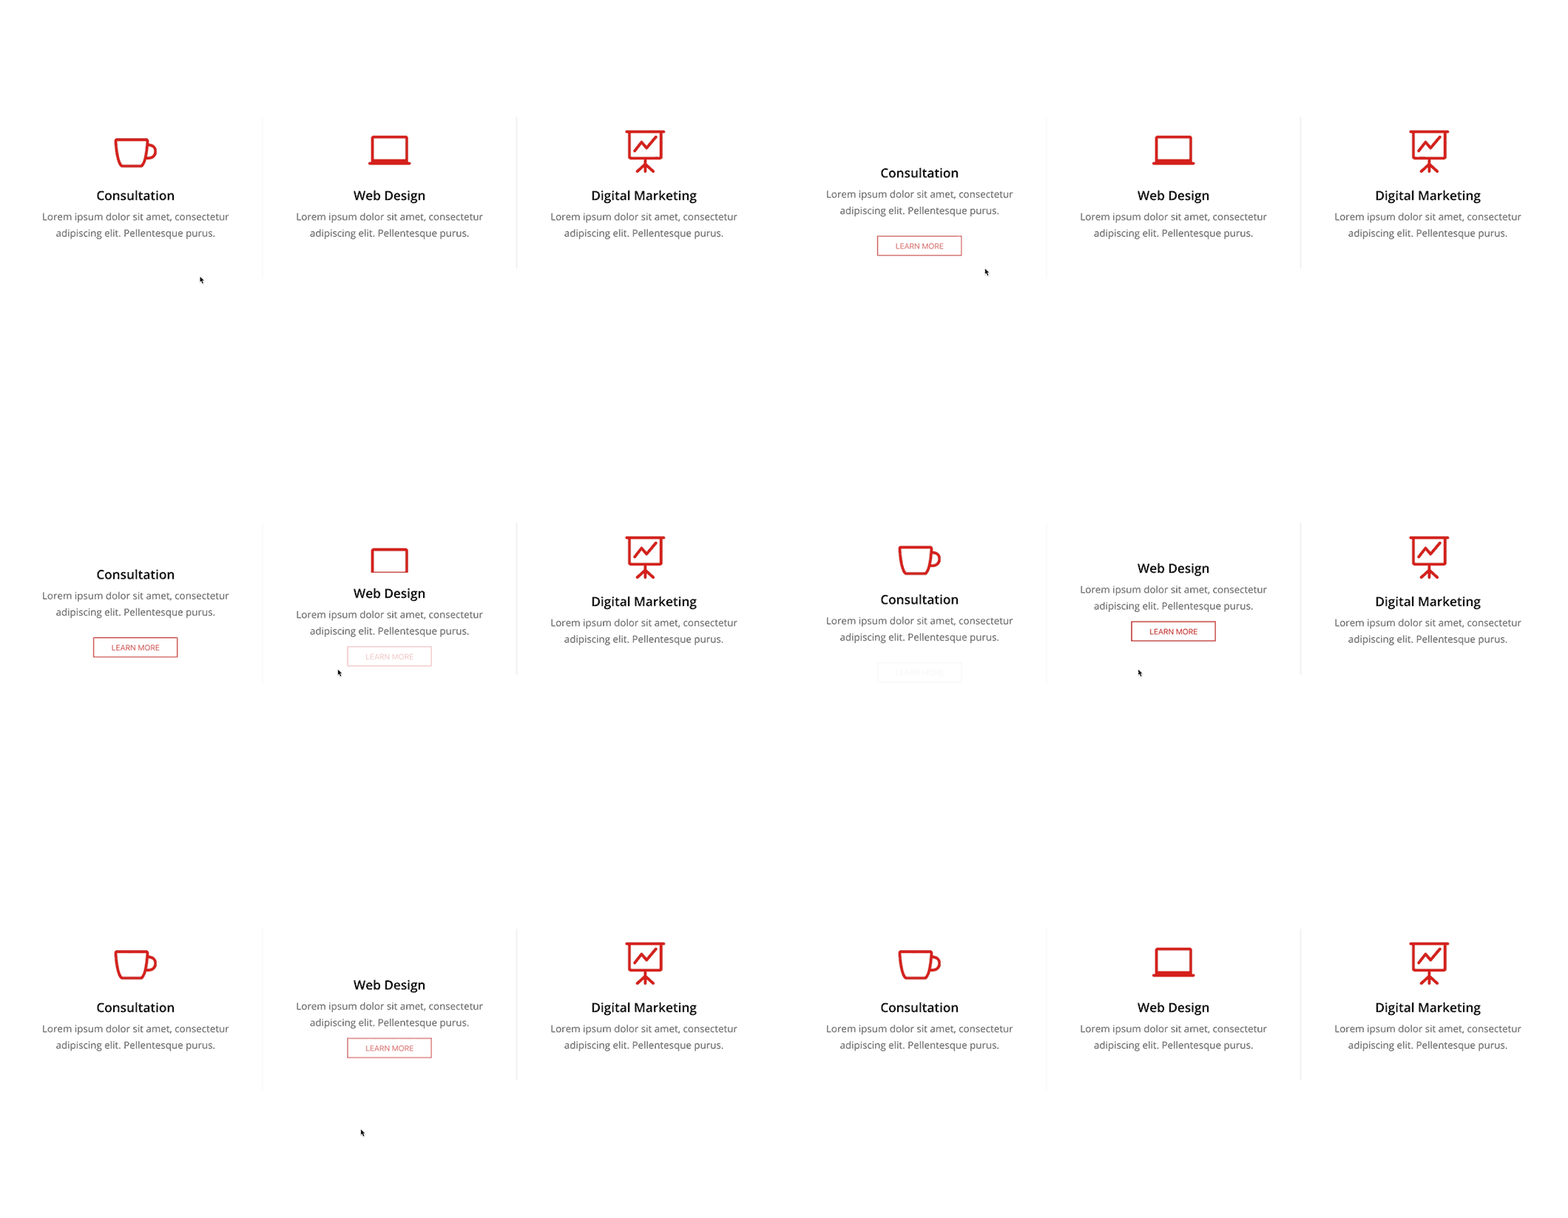
We have prepared this module for a client’s website (you can take a sneak peek here). On their website, the blurbs are used to showcase and link to additional services offered by the company.
As you can see, the module has been added to the footer, which is displayed globally. If you’d like to find out how to display a footer globally on your website, check out this tutorial – Using Divi Template Hooks to Add Global Footer Layout.
Let’s get back to our custom Divi blurbs because we have prepared a nice easy shortcut for you! This tutorial will guide you step by step through the process. But if tutorials are not your thing, and you’d like to achieve this effect right away, no sweat, then use our layout! You can download the layout and import it to your Divi Library. So simple!
If you haven’t seen our previous tutorials on blurbs, take a look:
Custom Blurbs – Part 1
Custom Blurbs – Part 2
And now, let’s get to work.
- You will need to have the Divi Theme by Elegant Themes installed.
- You can follow this tutorial or download our Ready-To-Use Divi Builder section with CSS code embedded.
Add section and columns
1. Add the Standard Section and select the three-column layout
2. Add the Blurb module to one column (we will be editing settings, and to save us some work, after finishing the module in the first column, we will copy it to the second and third column so the same options will apply).
Edit Gutter Width
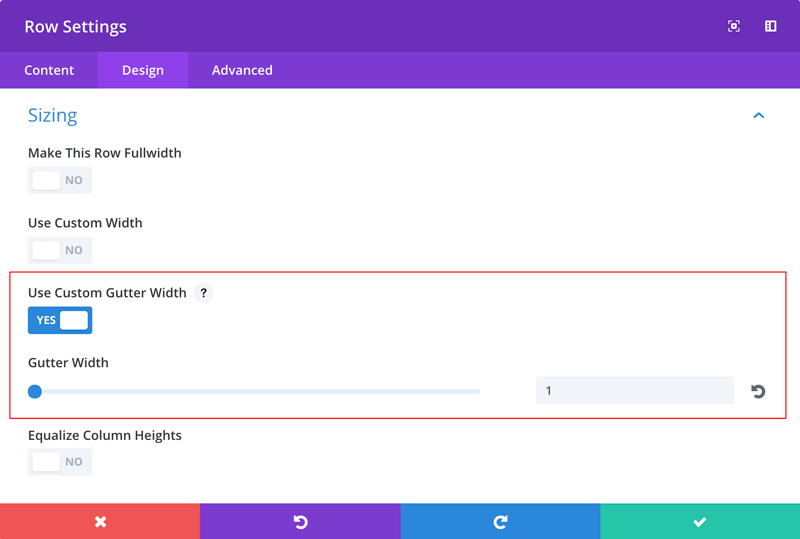
For this tutorial, we will use Custom Gutter Width which can be edited in Row Settings.
Open Row Settings, go to Design → Spacing tab, enable Custom Gutter Width, and set it to 1.
Edit Blurb Module Settings
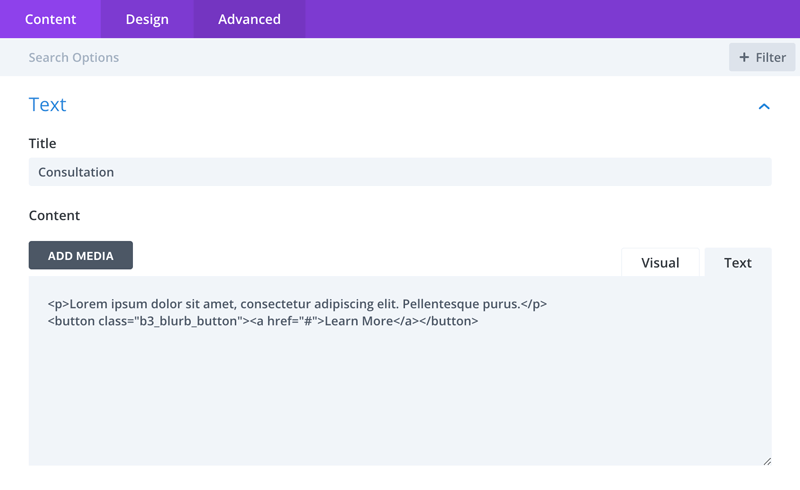
In this step, we will be editing Blurb Module Settings. We need to add the Blurb Title, select an icon and add description text. To embed button, we will add button class b3_blurb_button into the Content box.
CONTENT SETTINGS
1. Open Blurb Module Settings
2. Add Title and Content
3. Add Description Text. For the button, use class b3_blurb_button
DESIGN SETTINGS
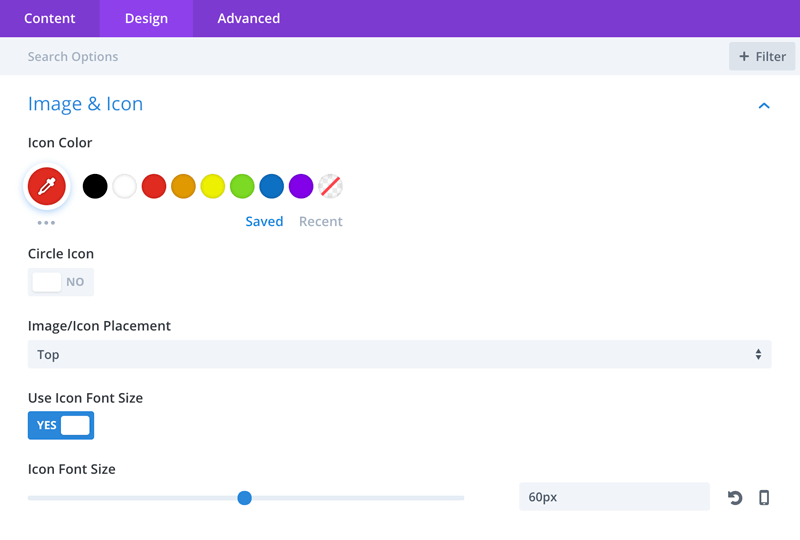
Image & Icon
1. Set Image/Icon Placement to Top
2. Use Icon Font Size – YES
3. Icon Font Size – 60px
Spacing
Go to the Spacing section and set the Custom Padding values as on the image below:
Border
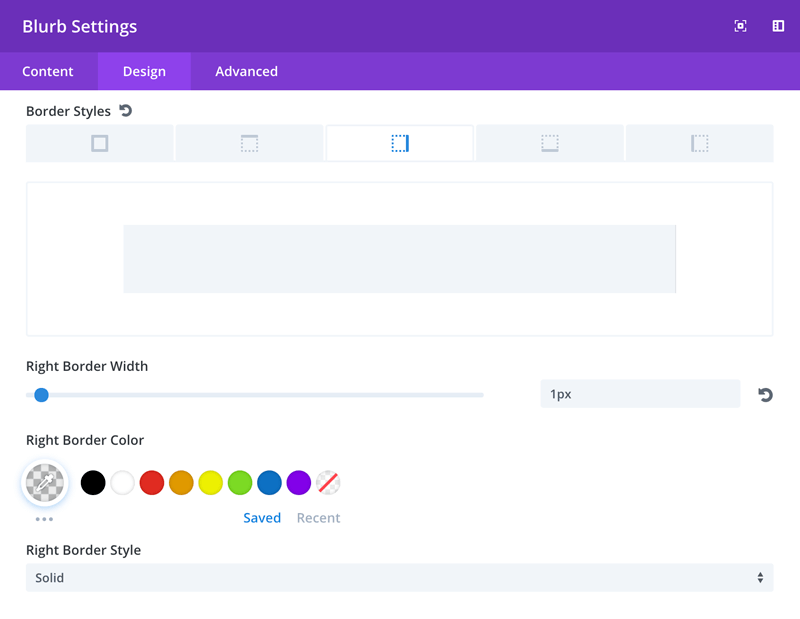
Now we need to set the delicate right border for our blurb. Go to the Border section and set 1px right border with the following color value: rgba(0,0,0,0.04) and Solid style.
Advanced
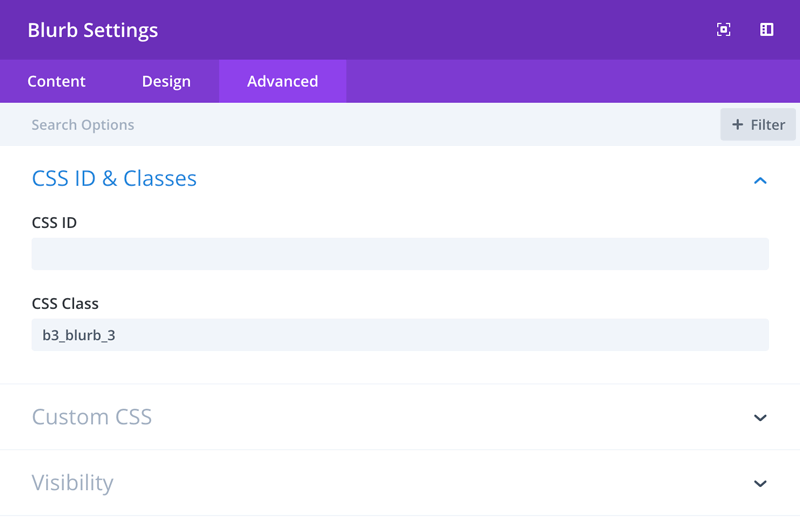
Finally we need to add a custom class to our blurb so the custom styles we are going to add in the next step will apply correctly. To do that, go to the Advanced tab and add b3_blurb_3 class to the CSS Class filed.
Copy Blurbs to all columns
We have our Blurb ready, so we can now copy it to the second and third column. As you have probably noticed, the last Blurb does not have the right border on our demo. To remove that border, open Blurb Settings for the last blurb, go to Design tab → Border, and remove the border setting we have applied in previous step for the right border.
Add CSS
In this last step, we will add some CSS to the Divi/Theme Options/Custom CSS section, or copy and paste it into your style.css file located in your child theme if you have one.
|
1 2 3 4 5 6 7 8 9 10 11 12 13 14 15 16 17 18 19 20 21 22 23 24 25 26 27 28 29 30 31 32 33 34 35 |
/* Add background color for Content */ .b3_blurb_3 .et_pb_blurb_container {padding-top: 20px;background-color: #fff;} /* Remove icon bottom margin */ .b3_blurb_3 .et_pb_main_blurb_image {margin-bottom: 0px;} /* Move Elements on Hover */ .b3_blurb_3:hover .et_pb_blurb_container {transform: translatey(-50px);} .b3_blurb_3:hover .et_pb_main_blurb_image .et_pb_image_wrap .et-pb-icon {transform: translatey(40px) !important;} /* Button Styles */ /* Default */ .b3_blurb_button{ border: 1px solid #ff0000 !important;; padding: 7px 25px; cursor: pointer; background: #fff !important; text-transform: uppercase; margin-top: 10px; opacity: 0; } .b3_blurb_button a {color: #ff0000} /* Hover */ .b3_blurb_button:hover{color: #fff !important; background: #ff0000 !important; letter-spacing: 1px;} .b3_blurb_button:hover a {color: #fff !important;} .b3_blurb_3:hover .b3_blurb_button {opacity:1 !important;} /* Transitions */ .b3_blurb_button, .b3_blurb_button:hover, .b3_blurb_3:hover .et_pb_blurb_container, .b3_blurb_3:hover .b3_blurb_button, .b3_blurb_3 .et_pb_blurb_container, .b3_blurb_3 .et_pb_main_blurb_image .et_pb_image_wrap .et-pb-icon, .b3_blurb_3:hover .et_pb_main_blurb_image .et_pb_image_wrap .et-pb-icon { -webkit-transition: all .2s ease-in-out; -moz-transition: all .2s ease-in-out; transition: all .2s ease-in-out; } |
Maciej Ekstedt
Maciej is the founder and CEO of B3 Multimedia Solutions. He is a self-made web designer and marketing expert, and he loves his job so much that he barely leaves the office. He transforms creative ideas into effective strategies for his company and for his clients. Maciej is fascinated by the phenomenon of megalopolis. He notices patterns and details which make up the whole thing, and he uses these skills in his work.
Consultation
Web Design
Digital Marketing
Get Divi Icons PRO today!
We have a sweet deal for you! You can get the best icon plugin for Divi with a 10% discount! Use the coupon code DIVIICONS10 at checkout!









wow awesome.. thanks for sharing.. I’ll definitely use this in my next project..